Creating beautiful, long-burning candles should be a relaxing and rewarding experience. Yet many candle makers find themselves frustrated when their finished products don’t turn out as expected. We’ve compiled the most frequent mistakes that candle makers encounter, along with practical solutions to help you create professional-quality candles every time. These insights come from years of experience and countless hours of troubleshooting, so you can avoid the trial-and-error process that trips up so many candle makers.
1. Using the Wrong Wick Size
The Mistake: Choosing a wick that’s too small or too large for your candle diameter is perhaps the most common error new candle makers make. This single choice affects everything from burn time to scent throw.
Why It Happens: Many beginners assume all wicks work the same way or simply guess based on appearance. Others don’t account for factors like diameter of the jart, wax type, fragrance load, or additives that can affect burn characteristics.
The Fix: Use a wick sizing chart specific to your jar diameter. You will find wick guides for both ACS and CDN wicks on our website. Always test burn your candles for at least 4 hours to ensure proper melt pool formation. The melt pool should reach the edges of the container within 2-3 hours of burning.
Pro Tip: Keep detailed records of which wick sizes work best with different wax and fragrance combinations. This becomes invaluable reference material for future projects.
2. Overheating the Wax
The Mistake: Heating wax beyond its recommended temperature can cause discolouration, poor scent throw, and even safety hazards. Many beginners think hotter wax melts faster and works better.
Why It Happens: Impatience often drives this mistake. Candle makers want to speed up the process, or they don’t have proper temperature monitoring equipment.
The Fix: Invest in a reliable thermometer and learn the optimal temperatures for your wax type. Soy wax should typically be heated to 170-185°F (77-85°C), while paraffin can handle slightly higher temperatures. Heat wax slowly and steadily, removing it from heat as soon as it reaches the target temperature.
Warning Signs: If your wax develops a yellowish tint or starts smoking, you’ve overheated it. Discard overheated wax rather than trying to salvage it.
3. Adding Fragrance at the Wrong Temperature
The Mistake: Adding fragrance oil when the wax is too hot or too cool dramatically affects scent throw and can cause the fragrance to burn off or not bind properly.
Why It Happens: This often stems from rushing the process or not understanding how temperature affects fragrance oil integration.
The Fix: Add fragrance oil when your wax reaches (75-82°C) for soy wax or (85-90°C) for paraffin. Stir gently but thoroughly for 2-3 minutes to ensure complete integration. The wax should be liquid enough for easy mixing but not so hot that it burns off the fragrance.
Quality Check: Properly integrated fragrance oil should distribute evenly throughout the wax without separation or clumping.
4. Pouring at Incorrect Temperatures
The Mistake: Pouring wax when it’s too hot can cause sinkholes, poor adhesion to containers, and cracked surfaces. Pouring when it’s too cool can create air bubbles and uneven surfaces.
Why It Happens: Beginners often don’t realise the importance of pouring temperature and that it is different from melting temperature. You need to have patience to let the wax cool to the optimal range.
The Fix: For soy wax, pour at between 57-63°C. For paraffin, aim for 71-77°C. The wax should flow smoothly but not be steaming hot. Let it cool gradually and naturally rather than using fans or cold environments.
Top Tip: Always check the pouring temperature of your wax as different brands will have different temperatures. The temperatures can be seen on each product page of our website.
5. Ignoring Proper Curing Time
The Mistake: Testing or using candles immediately after making them, before the wax has had time to properly set and bond with the fragrance oils.
Why It Happens: Excitement to see the finished product, or not understanding that candles need time to reach optimal performance.
The Fix: Allow wax candles to cure for a minimum of 1-2 days before burning. During this time, store candles in a cool, dark place away from temperature fluctuations.
Why It Matters: Proper curing allows the wax molecules to stabilise, improves scent throw, and ensures even burning. Uncured candles often have weak fragrance and poor burn characteristics.
6. Using Too Much Fragrance Oil
The Mistake: Adding excessive fragrance oil thinking it will create stronger scent throw, when it actually causes burning problems and can prevent proper wax setting.
Why It Happens: The assumption that more fragrance equals better performance, or not understanding fragrance load limits for different wax types.
The Fix: Stick to recommended fragrance loads: 6-10% for soy wax, 8-12% for paraffin. Quality fragrance oils at proper concentrations perform better than cheap oils used in excess.
Consequences of Overloading: Excess fragrance can cause smoking, poor burn quality, frosting, and even prevent the candle from setting properly.
7. Poor Container Preparation
The Mistake: Not properly cleaning containers or failing to secure wicks correctly, leading to off-centre wicks, poor adhesion, or contamination.
Why It Happens: Rushing through preparation steps or not understanding their importance to the final product.
The Fix: Clean all containers so they are clean and dust free. Use wick stickums or hot glue to secure wicks to the centre bottom of containers. Double-check wick positioning before pouring.
Professional Touch: Use wick holders across the container rim to keep wicks perfectly centred during pouring and cooling.
8. Creating Unrealistic Colour Expectations
The Mistake: Using food colouring instead of candle dye, or adding too much colouring agent, which can clog wicks and affect burn quality.
Why It Happens: Trying to cut costs with household items or not understanding the difference between candle-specific and general-purpose dyes.
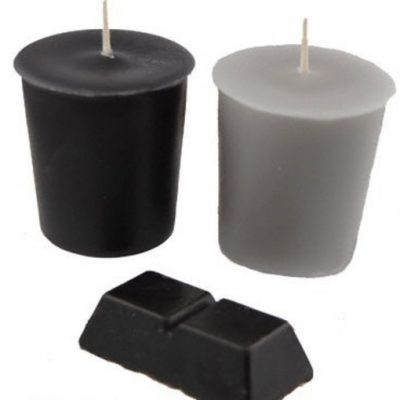
The Fix: Use only candle-specific liquid dyes or dye blocks. Start with tiny amounts – a little goes a long way. Remember that some wax types, particularly soy, may not achieve deep colours and will appear more pastel.
Reality Check: Natural soy wax has inherent limitations for achieving vibrant colours. Liquid dye will create a stronger colour than dye blocks. Also think about using a UV stabiliser to lock in the colour of your candle.
9. Inadequate Testing and Record Keeping
The Mistake: Making large batches without testing, or failing to document what works and what doesn’t, leading to repeated mistakes.
Why It Happens: Overconfidence after initial success, or underestimating the importance of systematic testing.
The Fix: Always make test candles in small containers first. Document everything: wax type, wick size, fragrance type and percentage, temperatures, and results. Test burn each candle for several hours and note performance.
Testing Protocol: Grab your self some testing sheets and make sure you burn test candles for 4-hour sessions, noting melt pool formation, flame size, and scent throw. Take photos to document visual results.
10. Rushing the Learning Process
The Mistake: Expecting perfect results immediately or skipping fundamental steps to speed up the process.
Why It Happens: Underestimating the skill and patience required for consistent candle making, or pressure to produce gifts or products quickly.
The Fix: Embrace candle making as a skill that develops over time. Start with simple, single-wick candles before attempting complex designs. Focus on mastering basics before experimenting with advanced techniques.
Growth Mindset: View mistakes as learning opportunities rather than failures. Each candle teaches you something valuable about the process. If you need some top tips book yourself into a candle class and learn from the candle making experts at Candle Creations
Moving Forward: Your Candle-Making Success Plan
Creating exceptional candles requires patience, attention to detail, and willingness to learn from mistakes. Start by addressing the most critical issues first: wick sizing and temperature control form the foundation of successful candle making.
Keep detailed records of your processes and results. This documentation becomes invaluable as you develop your skills and create your signature candle styles. Remember that even experienced candle makers encounter challenges when working with new materials or techniques.
Consider joining candle-making communities or taking workshops to accelerate your learning. Sharing experiences with other crafters provides insights you might not discover on your own.
Most importantly, enjoy the process. Candle making should be relaxing and rewarding. When you understand and avoid these common mistakes, you’ll spend more time creating and less time troubleshooting, leading to beautiful candles that burn beautifully every time.

