The art of candle colouring is fun and one of the most exciting parts of the creative process. It is where you can truly let your personality shine, transforming a simple block of wax into a vibrant work of art. But achieving that perfect, consistent hue can sometimes be tricky. Have you ever aimed for a deep burgundy and ended up with a pale pink, or found your beautiful blue candle speckled with uneven colour?
Mastering the art of candle colouring is a game-changer for any candle maker. It allows you to create products that are not only beautifully scented but also visually stunning. This guide is packed with practical tips and techniques to help you achieve vibrant, consistent colours every time. We will explore the different types of dyes, show you how to mix them effectively, and even dive into creative effects like marbling and layering.
Choosing Your Colour: A Guide to Candle Dyes
The first step to beautiful colour is selecting the right type of dye for your project. Each has its own unique properties and benefits. The three main types you will encounter are dye blocks, liquid dyes, and dye powders.
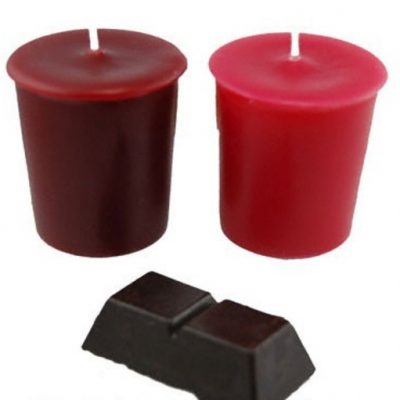
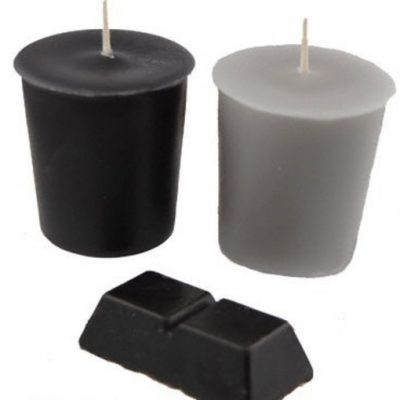
Dye Blocks
Dye blocks are solid, concentrated blocks of colour mixed with wax. They are incredibly easy to use, making them a favourite among both beginners and seasoned candle makers.
- How to Use: Simply shave or chop off a small amount of the block and add it to your melted wax. Stir gently but thoroughly until the dye has completely dissolved. The key is to start with a very small amount—a little goes a long way!
- Best For: Achieving consistent, even colour in large batches. Because they are pre-mixed with wax, they dissolve easily and distribute evenly. They are perfect for solid-colour pillar and container candles.
Liquid Dyes
Liquid dyes are highly concentrated and offer a powerful punch of colour. They are easy to measure and mix, giving you precise control over the final shade.
- How to Use: Add the dye drop by drop to your melted wax until you reach your desired colour. Stir well to ensure the colour is evenly distributed throughout the wax. It’s often better to add your dye before you add your fragrance oil.
- Best For: Creating custom shades and vibrant, bold colours. Liquid dyes are excellent for testing small batches, as you can easily adjust the intensity one drop at a time.
Dye Powders (Mica Powders)
Mica powders are fine, shimmering powders that can add a beautiful, pearlescent effect to your candles. While traditional dye powders are used to colour the wax itself, mica powders are slightly different.
- How to Use: Mica powders do not fully dissolve in wax. Instead, the tiny particles are suspended, creating a mesmerising shimmer as the candle burns. For a subtle sparkle, mix a small amount into your melted wax. For a more dramatic effect, you can paint the mica onto the inside of your mould before pouring the wax, or dust it over the top of a finished candle.
- Best For: Creating decorative or novelty candles with a metallic or glittery finish. They are perfect for wax melts, where the shimmer becomes more visible in the melted pool of wax.
How to Achieve the Perfect Shade
Colour theory is not just for painters. Understanding how to mix and test your colours is crucial for getting the results you want.
Start Small and Test, Test, Test
The golden rule of candle colouring is to start with less dye than you think you need. You can always add more, but you cannot take it away. The colour of the melted wax will look much darker than the final, hardened product.
To accurately preview the final colour, use the “drip test.” After mixing your dye into the melted wax, drip a few drops onto a white piece of paper or a ceramic plate. Wait for it to cool and harden completely. This will give you a true indication of the final shade.
The Art of Mixing Colours
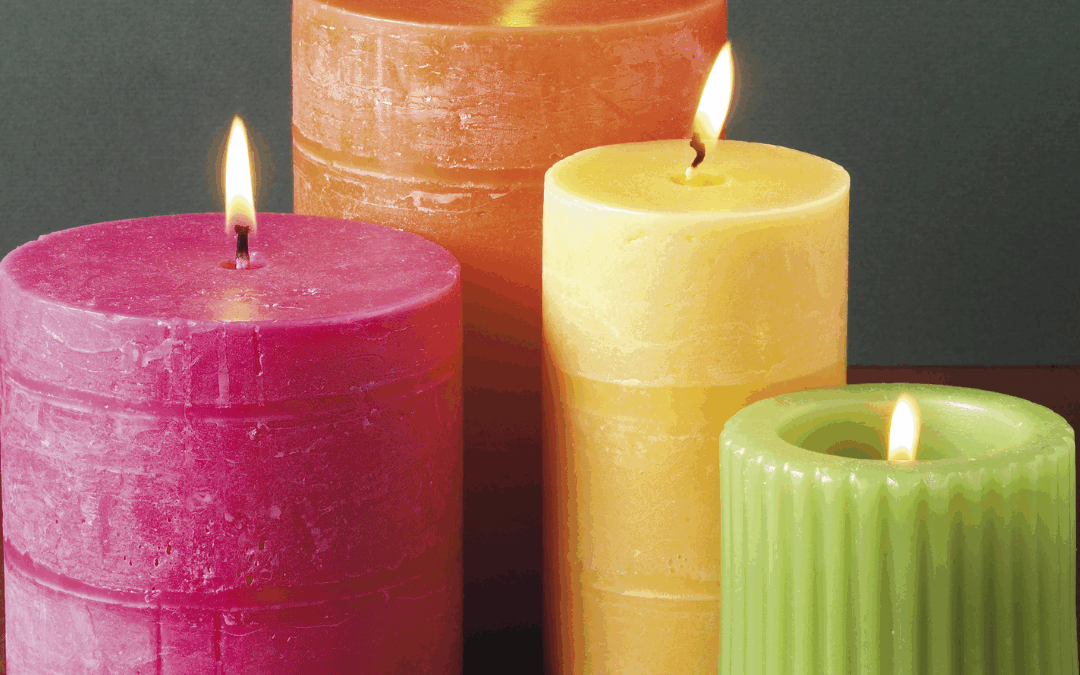
There is a wide selection of colours that you can buy premixed but if you feel like creating your own custom colours then why not start with the primary colours: red, yellow, and blue.
- To create green: Mix yellow and blue.
- To create orange: Mix red and yellow.
- To create purple: Mix red and blue.
- To create brown: Mix red and green.
When mixing, add the darker colour to the lighter colour in very small increments. For example, if you are making purple, start with your red wax and add blue drop by drop. This gives you more control over the final hue. Keep a notebook to record your colour “recipes” so you can replicate your favourite custom shades in the future.
Creative Colouring Techniques
Once you have mastered solid colours, you can start experimenting with more advanced techniques to create truly unique candles.
Layered Candles
Creating layered candles is a simple way to produce a visually stunning effect.
- Pour your first layer of coloured wax into your container.
- Wait for it to set completely.
- Gently pour the next layer of a different coloured wax on top. To avoid melting the first layer, let the wax for the new layer cool slightly before pouring, and pour it slowly over the back of a spoon.
- Repeat with as many colours as you like, allowing each layer to set before adding the next.
Marbled Candles
Marbling creates an elegant, organic pattern of swirling colours.
- Pour your base colour of wax into your container or mould, filling it almost to the top.
- Wait for the wax to cool slightly, until it starts to look cloudy and a thin skin has formed on top.
- Prepare a small amount of a contrasting colour.
- Gently pour the contrasting colour in thin streams over the top of the base wax.
- Use a skewer or thin stick to slowly and minimally swirl the colours together. Do not over-mix, or the colours will blend into one.
Troubleshooting Common Colouring Candle Challenges
Even experienced candle makers run into issues sometimes. Here is how to solve the most common colouring problems.
- Uneven Colour or Specks: This usually happens when the dye has not fully dissolved in the wax.
- Solution: Make sure your wax is at the correct temperature when you add the dye (check the wax manufacturer’s instructions). Stir gently but thoroughly for at least two minutes to ensure the dye is completely integrated. If using dye blocks, make sure they have fully melted.
- Colour Fading: Exposure to direct sunlight or harsh fluorescent lighting can cause the colour in your candles to fade over time.
- Solution: Add a UV inhibitor to your wax. This special additive works like sunscreen for your candles, protecting the colours from fading. Store finished candles away from direct light sources.
- Colour Bleeding: In layered candles, sometimes the colour from one layer can “bleed” into the next.
- Solution: Ensure each layer is completely cool and set before pouring the next one. Using a harder wax can also help prevent bleeding.
Let Your Creativity Shine
Colouring candles is a journey of experimentation and discovery. Do not be afraid to play with different dyes, mix custom shades, and try new techniques. Every candle you make is a chance to learn and refine your craft. By following these tips, you will be well on your way to creating beautifully coloured candles that look as good as they smell.
Ready to add a splash of colour to your creations? Explore our wide range of candle dyes and colouring supplies at Candle Creations. From vibrant liquid dyes to easy-to-use dye blocks, we have everything you need to bring your colourful visions to life.